
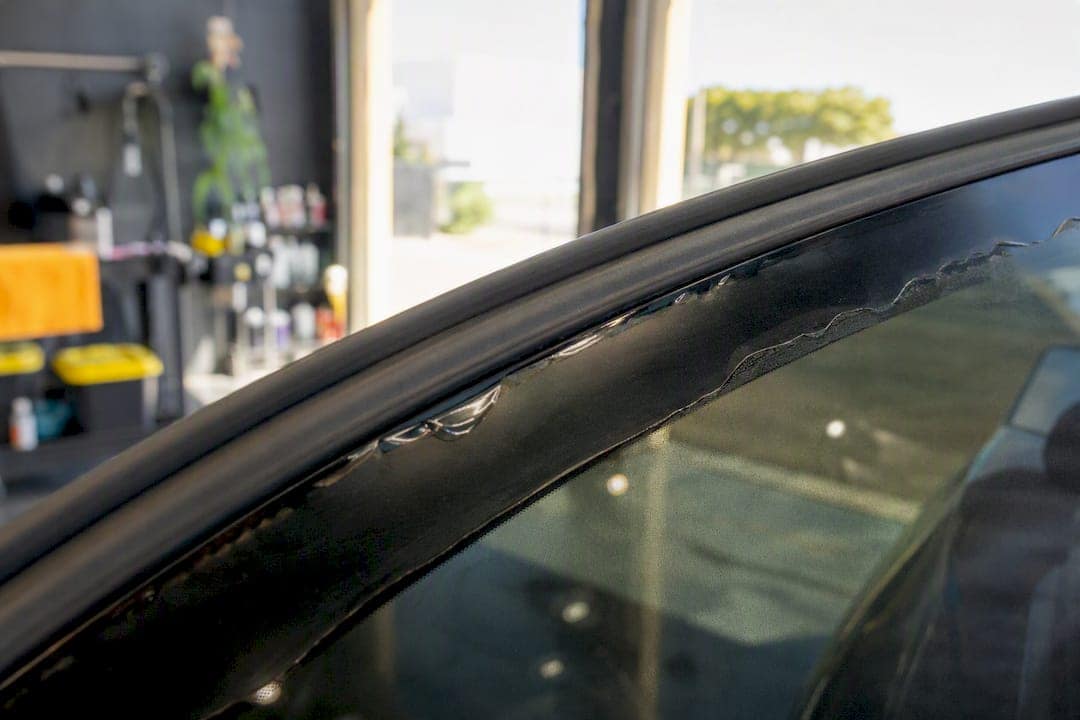
Window tint peels because the adhesive bond between the film and the glass has broken down, usually from a rough installation, cheap film, or heat and UV exposure over time. If the bubbles just showed up in the last few days, leave them alone and let the film cure. If they’ve been there for weeks and the edges are lifting or turning purple, you’re looking at adhesive failure, and no amount of patience fixes that.
Quick fact: the International Window Film Association points to improper installation as the leading cause of premature tint failure, which is exactly why installer technique matters as much as the film itself.
Tint peeling almost always starts with either a flawed installation or adhesive breakdown from heat and UV exposure, and the fix depends entirely on timing and severity.
| Point | Details |
|---|---|
| Check the timeline first | Bubbles under 72 hours old are usually curing moisture; older bubbles signal adhesive failure. |
| Watch for purple discoloration | Faded or purple film means the dye layer broke down and needs full replacement. |
| DIY only works on small lifts | Minor corner lifts with clean adhesive can be re-stuck; trapped debris usually can’t. |
| Skip ammonia-based cleaners | Ammonia degrades film topcoat and adhesive, accelerating future peeling. |
| Professional reinstall solves recurring failure | The PPF Company offers ceramic and carbon film upgrades with warranty-backed installation in Calgary and Winnipeg. |
Most peeling traces back to one of four culprits, and figuring out which one you’re dealing with tells you how bad the damage really is.
Installation errors top the list. Dust trapped under the film during application, uneven squeegee pressure, or edges cut too tight against the seal all create weak spots where air and moisture sneak in later. Cheap film makes it worse. Dyed tint tends to fade and lose adhesive strength faster than carbon or ceramic film, which resist the sun-driven breakdown known as photodegradation far longer.
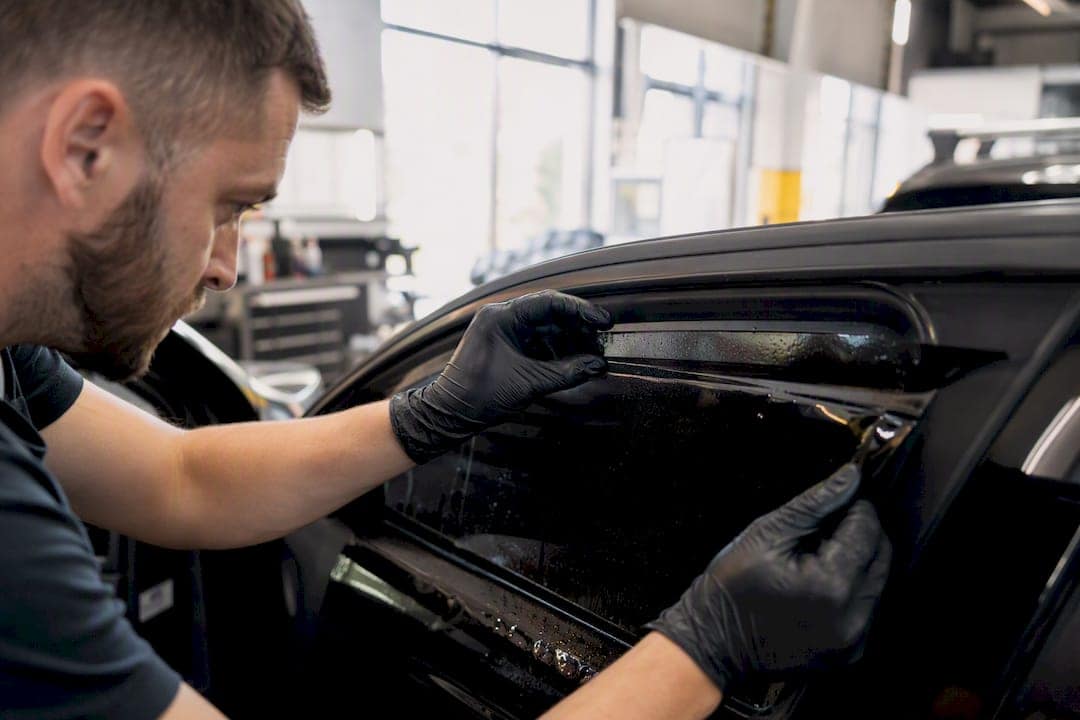
Heat plays its own role. Calgary summers push interior glass temperatures well past what the adhesive was designed to handle repeatedly, and constant heating and cooling cycles stress the bond every single day. Defroster zones on rear windows take the worst of it, since that concentrated heat ages the film faster than the surrounding glass.
Then there’s plain mechanical wear:
Edge failures usually start small and spread. Once the perimeter begins lifting, the exposed adhesive dries out faster, and the peeling creeps inward.
Timing tells you almost everything. Bubbles that show up in the first couple of days after installation are usually trapped moisture working its way out as the film cures, and they typically flatten out on their own. Cooler or more humid conditions can stretch that curing window longer than the standard guideline, so don’t panic if day three still shows a few small pockets.
Here’s how to tell the difference:
DIY re-sticking works when the problem is small: a corner lifting slightly, no discoloration, and adhesive that still looks clean underneath. If you’re seeing purple tint or bubbles spread across a whole panel, skip ahead to calling a pro. Here’s the safe method for minor lifts.
What you’ll need: distilled water or isopropyl alcohol, a spray bottle, a lint-free microfiber cloth, a plastic squeegee or old gift card, and a hair dryer set to low heat.
A few things to avoid: never aim direct heat near defroster wires, since it can damage the grid. Skip ammonia-based glass cleaners entirely. And resist the urge to reach for hairspray, super glue, or other household fixes; they don’t bond correctly with window film and often make the next repair harder.
Pro Tip: If the bubble is actually a tiny “tent” caused by trapped dust or lint, DIY re-sticking almost never holds. The debris keeps the adhesive from making full contact with the glass, and pressing it down usually just stretches the tent bigger.
Some damage is beyond a spray bottle and a squeegee. Purple or oxidized film, bubbling that covers more than a small patch, tenting with debris you can’t clean out, or a DIY fix that failed once already are all signs it’s time to book a professional removal and reinstall.
A trained installer brings tools and know-how a driveway repair can’t match:
A full reinstall done right should come with a warranty and film that resists the same fading and adhesive breakdown that likely caused the original problem. That’s the real value of paying for the work twice: the second time, it’s built to last.
With over 30 years of combined installer experience, the team at The PPF Company has seen every version of this problem, from rushed factory tint jobs to years-old film that finally gave out.
Prevention starts the moment your new film goes on, not months later when you notice the first bubble.

Keep your windows up for the full curing period your installer recommends before rolling them down or running the car through a wash. Rolling too soon while the adhesive is still soft is one of the most common ways owners undo a perfectly good install. When you do clean the glass, stick to ammonia-free automotive glass cleaner and a soft microfiber cloth. Ammonia breaks down the film’s topcoat and adhesive over time, leading to exactly the peeling and haze you’re trying to avoid.
Parking matters more than most owners realize. Shade or a garage reduces the daily heat cycling that stresses the adhesive bond, and repeated extreme heat exposure is a direct contributor to premature film failure.

Build a habit of checking your tint edges every month or two. Catching a tiny lift early, before it spreads or collects debris, is the difference between a five-minute fix and a full replacement.
Quick fact: installation quality and film grade, more than any single environmental factor, determine how long tint lasts before peeling becomes a real risk.
The mistakes we see most often aren’t dramatic. Owners roll their windows down the same day, wipe the inside glass with whatever cleaner is under the sink, or ignore the aftercare sheet entirely. None of that feels reckless in the moment, but it’s exactly what shortens film life. If there’s one habit worth building, it’s reading the aftercare instructions your installer hands you and actually following them for the first week. Ask about warranty coverage and film grade before you book. Cheaper dyed film will always be more peel-prone than ceramic or carbon, and that’s not a sales pitch, it’s just physics.
If your tint has moved past a small edge lift into purple discoloration, spreading bubbles, or a failed DIY attempt, a fresh professional install costs less in the long run than repeated patch jobs. The PPF Company handles safe removal, defroster-safe techniques, and precision-cut reinstallation with ceramic and carbon film options built to outlast the dyed tint that likely caused your original headache.
Whether you’re in Calgary or Winnipeg, the process starts with a quick look at your current film to confirm whether it’s a repair or a full replacement situation. From there, you get a straightforward quote and a warranty-backed install instead of another round of trial and error. If you’re ready to stop chasing bubbles yourself, book a window tinting appointment in Calgary or check Winnipeg window tinting to get your car back to looking the way it should.
Yes. Even properly installed tint can eventually peel from years of UV exposure and heat cycling, though quality film and professional installation delay it significantly compared to cheap dyed tint.
Lift the loose edge, clean the exposed glass and adhesive with isopropyl alcohol, warm the film gently, then squeegee it flat from the center outward. This only works if the adhesive is still clean and intact underneath.
No. Purple or faded tint means the dye layer has broken down chemically, and no cleaning or reheating restores the color. Full replacement is the only real fix.
Small bubbles in the first few days after installation are typically trapped moisture releasing as the film cures. They usually flatten out on their own within the first week.
No. Wait through the full curing period your installer recommends before washing or rolling your windows down, since disturbing the film too soon can cause the adhesive to lift.