
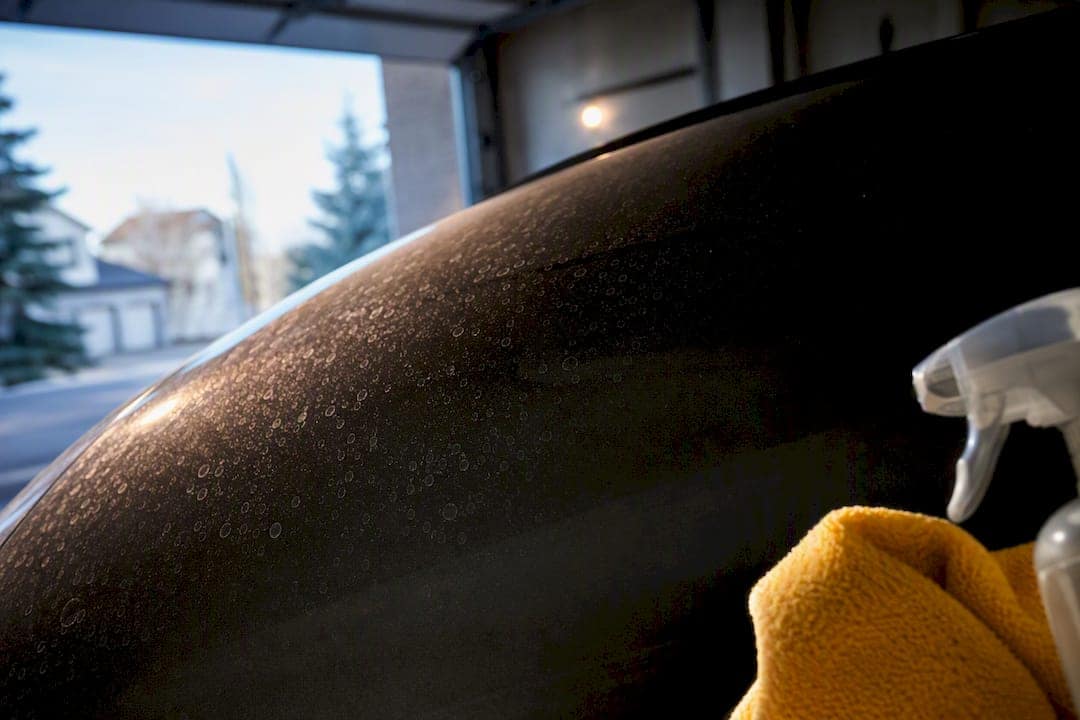
Most water spots on ceramic-coated cars are removable if you treat them promptly: fresh mineral deposits dissolve with the right chemistry, while etched marks need polishing or professional correction. If a spot appeared in the last few days, work in the shade on a cool panel, wipe it with a damp microfiber towel, and follow up with a pH-balanced spot remover. Coatings shorten how long water sits on the surface, but they don’t neutralize the minerals inside it.
TL;DR:
- Water spots caused by high mineral content can often be removed if treated within days using a pH-balanced remover and gentle wiping, especially on fresh deposits.
- Beading caused by ceramic coatings concentrates minerals, making water spots more visible and potentially more damaging on dark-painted surfaces.
- Surface mineral deposits are easily cleaned with a microfiber towel and mild acid, but deeper etchings require machine polishing or professional repair.
- Preventative measures include using filtered water, drying promptly with dedicated tools, and applying boosters every few months to maintain the sacrificial layer.
- For stubborn stains or phantom spots after coating application, professional inspection and controlled correction techniques are recommended to avoid unnecessary paint removal.
A ceramic coating’s whole job is to make water bead up and roll off. That’s exactly what causes the problem. When a droplet beads on a hydrophobic surface instead of spreading into a thin sheet, it evaporates from a small, concentrated footprint, and every mineral it carried gets left behind in that same tight ring. The beading effect actually concentrates dissolved minerals rather than spreading them thin, which is why coated dark paint often shows spotting more visibly than an untaxed hood ever did.
A few factors decide how bad the damage gets:
Not every spot needs the same fix, and treating a mild one like a severe one is how owners strip clearcoat they didn’t need to touch. A tiered diagnostic approach separates surface deposits from actual etching before you reach for anything abrasive.
Pro Tip: Run the ladder in order every time, even when a spot looks obviously bad. A wet wipe and a short acid dwell take under two minutes and save you from polishing a spot that only needed a rinse.
Prevention is almost entirely about limiting how long mineral-rich water sits on the surface and evaporates undisturbed. A regular wash keeps deposits from building up into layers that get harder to shift each time you skip a cycle.
Drying technique matters as much as wash frequency. A dedicated drying towel or a leaf-blower-style drying tool removes standing water before it can evaporate on its own, and a ceramic-safe drying aid adds slip that helps water sheet off rather than pool in low spots on the hood or roof.
Pro Tip: Keep a spray booster in the trunk. A quick mist-and-wipe after a car wash or a rainy commute stops spots from setting overnight, which is when most etching actually happens.
You’ll find a full breakdown of ideal intervals and product choices in our ceramic coating maintenance guide.
Fresh, Type 1 spots respond well to a careful, low-risk process. The goal is to dissolve the mineral deposit without letting anything acidic sit on the paint longer than it needs to.
Skip household descalers or anything not formulated for automotive paint. They’re often far more aggressive than labeled and can etch coating that a proper spot remover would have left untouched. Never work on a panel that’s hot from direct sun, and never scrub hard enough to feel resistance. If the spot doesn’t shift with gentle agitation, it’s not a Type 1 anymore. Our ceramic coating car wash guide covers the broader washing routine this fits into.
Confirming an etch before you touch a polisher saves you from unnecessary paint removal. Run a fingernail across the spot; if it catches even slightly, or the area looks rough and dull under a flashlight held at an angle, you’re dealing with a Type 2 or Type 3 mark rather than a surface deposit.
For shallow etching, a dual-action (DA) polisher with a light cutting pad and a finishing polish is the safest tool for an owner to run at home. DA polishers oscillate rather than spin continuously, which drastically cuts the risk of burning through clearcoat compared to a rotary buffer.
Pro Tip: Reapplying protection isn’t optional after polishing. Any correction strips the coating’s outer layer along with the etch, so the panel is bare again the moment you set the polisher down. Our paint correction guide walks through what a proper correction sequence looks like before a coating goes back on.
Phantom spots show up in the days after a fresh ceramic coating installation, often on panels that were never near sprinklers or hard water at all. The likely cause is the paint or coating still curing and reacting to trapped solvents or minor surface contaminants, not an actual mineral deposit sitting on top.
Professional detailers resolve these with methods that go beyond typical consumer chemistry:
If a spot appears within the first week or two of a new install, contact the installer first. If it shows up months later on an established coating, that’s a maintenance issue calling for the diagnostic ladder above rather than an installer callback.
A coating only performs as well as the routine behind it. Spreading tasks across a simple calendar keeps spotting rare instead of routine.
Coatings make maintenance dramatically easier, but they were never marketed as an absolute barrier against hard water chemistry, and treating them that way is how owners end up disappointed. A consistent wash cadence and a booster every few months do more to prevent spotting than any single product claim on a coating’s bottle. When you’re staring at a mark that survived a wipe and an acid dwell, or a phantom spot that showed up out of nowhere after an install, that’s the point to call in a professional rather than keep escalating your own polishing.
Professional inspection services provide a practical alternative to guessing your way through a Type 3 etch or a stubborn phantom spot. We run a diagnostic inspection first, test-polish a small area to confirm severity, then build a spot-correction plan before any recoating happens, so you’re never paying for more correction than the paint actually needs.

If a spot survives a wet wipe and a mild acid dwell, or you’re seeing dull, rough patches across multiple panels, that’s your signal to stop DIY testing and book a real inspection. It’s the same call for phantom spotting that shows up right after a new install. Get a diagnostic booked through our ceramic coating Calgary page or check maintenance packages on our ceramic coating maintenance page if a booster top-up is all you need right now.
For deeper detail on the chemistry behind hard water etching, see the breakdown of what dissolves water spots and the silica and pH explainer. For a practical owner walkthrough, see safe removal steps from Diamondbrite.
Yes, in most cases. Fresh mineral deposits (Type 1) usually lift with a wet microfiber wipe and a pH-balanced spot remover, while etched marks need polishing or professional correction.
Coatings reduce how long water clings to the surface through beading, which limits how much mineral residue gets left behind, but they don’t make hard water harmless. Spotting still happens, just less often and often less severely than on bare paint.
Sluggish or absent beading, water sheeting instead of forming tight droplets, and increasing spot severity over time all point to a coating that’s due for a booster or a full recoat.
High spots or streaks right after application are usually leveled with a light buffing pass using a clean microfiber applicator before the coating fully cures, though established phantom spotting after cure calls for a professional’s controlled heat and single-pass polishing approach.